Enjoy
your stay...
|
Enjoy
your stay...
|
|
|
|
TUTORIAL
6: Rendering A
|
|
|||
|
|
|
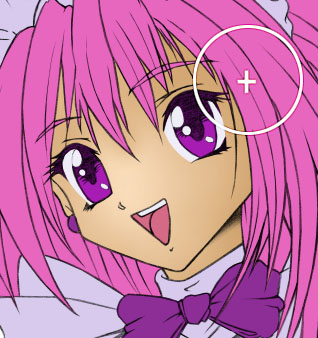
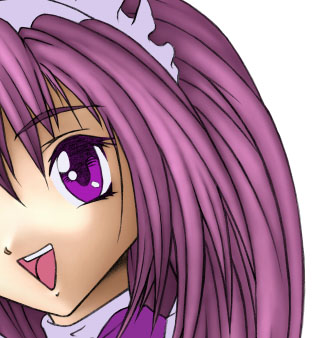
Now I'm going to add some basic rendering to the Skin to give it a little more life and depth. From here you could choose to colour typical anime cel-style, but I'm going to go for a soft airbrush look.
The
head is a sphere and to create roundness you can darken the 'edges'
of the sphere to create depth. I use a large airbrush size set at 10%
pressure (less pressure= more control) and blend a darker tone around
the edges in towards the centre (see Fig 12.). Next, I decide on my light source. This time I'm going for light coming from the left, so I will start to build up shadow to areas where the light doesn't reach. For example, the nose sticks out and blocks the light from hitting all of the face, so I added shadow to the right of the nose to illustrate this. To build up the shadows and introduce more depth, select another slightly darker colour than the one you've just used to add more graduated shadow. I carefully blend this in to the outer edges of the face where the light doesn't reach as much. Repeat this process of selecting another slightly darker colour, then adding more dark to the outer most edge. With practice you'll end up with a gradual blend from the original skin tone, to the darkest tone (see Fig 13.). I also added some highlights to areas that stick out, e.g. the nose.
Adding
the correct shadows and rendering is something which takes practice
and when starting out, it's always a good idea to use photos or real
life for reference on where to add shadows and rendering. If you're
attepting to CG for the first time, please use this tutorial as a guide.
You might not get the same resualts or use the same methods, but will
hopefully point you into the right direction and show you how I do it.
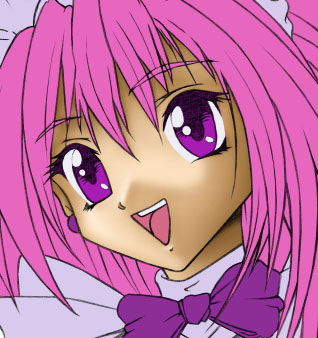
Now the skins done, I move onto the hair and repeat the processes of gradually building up the shadows with the airbrush tool. I start with adding a darker tone around the edges to give a little depth (see Fig 15.).
Like with the skin, I add another darker tone to the hair, blending from the edges (see Fig 16.). you can see already that the hair has been given a lot more depth by gradually building up the shadows. A lot of beginners to CGing are usually satisfied with the first wave of airbrushing to their illustration and yeah, it looks ok, but definitely isn't anything special and everyone loves spectacular looking illustrations! So by putting in a little more time to create a more dramatic effect, you'll get a more dramatic response from your audience!
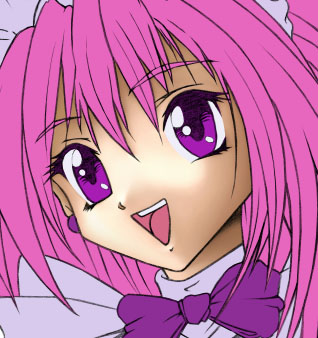
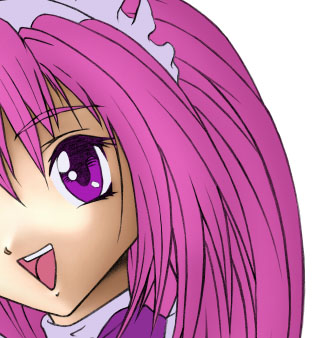
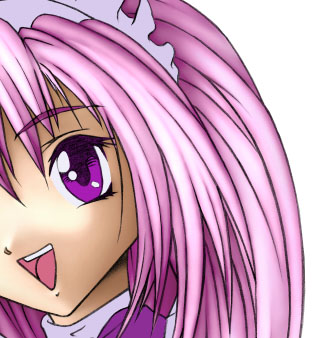
Having access to a Graphic Tablet can be really useful for CGing hair and CGing in general! The hair looks a little messy so I use the smudge tool to help blend out the mess. Then I applied some darker airbrush to the edges of the hair, remembering my light source. I also added some lighter areas to the centre of the hair bunches. To enhance the hair a little more, I increased the contrast levels also (see Fig 17.)
Anime hair is typically very shiny so high contrasts between lights and darks always gives a healthy, silky look to the hair and by once again adjusting the Contrast values, you can get this effect and keep it all looking nicely blended. I
originally wanted to go for a much lighter pink colour for the hair,
so some more dabbling with Contrast levels and I'm done! (see
Fig 18.)
Summary:
|
||
|
|
||||
|
|
||||
|
All material used on this site is © of their respective owners and may not be used without the owner's consent. Organic Metal is copyright © 2000 - Present Ben Krefta. |