Enjoy
your stay...
|
Enjoy
your stay...
|
|
|
|
TUTORIAL
3: Getting ready to colour
|
|
|||
|
|
|
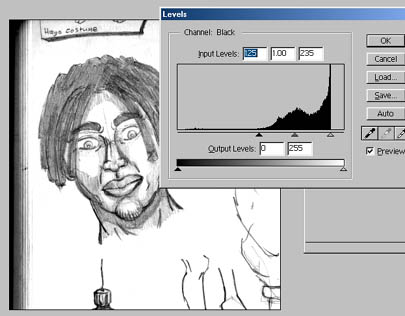
Now after I've scanned my work into Photoshop, I'll need to clean it up (see Fig 2.).
First thing I do is adjusting the levels: -Image -Adjust -Levels (CTR+L). Just spend a bit of time tweaking the gamma levels until the lines look nice and dark and the white background goes pure while without any discoloration or smudges being visible (see Fig 3.).
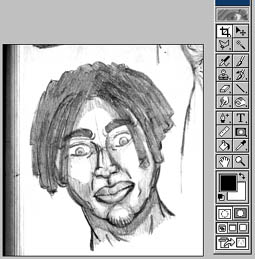
You might prefer the look of really dark lines if you've just scanned in some pencil work, or you might like to keep it lighter like the original, its personal preference really. I usually go for something twice as dark as my original sketches because I usually draw with a 2H pencil. Alternatively you might want to fiddle around with the brightness and contrast: -Image -Adjust -Brightness. I've seen so many picture that could have looked twice as good if only they could be bothered to spend a little time cleaning up the image and making the lines look sharper, so it's very important to prepare the image in the correct way, whether you wish the later colour it or not. Sometimes when you scan, the image won't appear dead straight, so you might want to adjust and rotate the canvas slightly. Usually I'd adjust the canvas size of my image making it slightly bigger around all the edges by 100 pixels or so, then: -Image -Rotate canvas -Arbitrary, then rotate CW (clockwise) or ACW (Anti clockwise) from 0.4 degrees to 4 degrees, or however much you need to get the image lined up perfect. Now you'll want to crop the image. Using the crop tool is best to get rid of any un-needed boarder. It's always a very good idea to crop a picture down to size if there's a lot of unnecessary blank space (see Fig 4.).
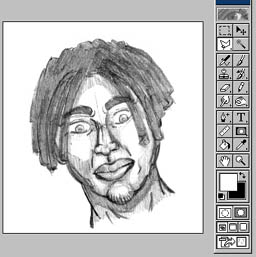
There might be a few smudges or random dark unwanted pixels still on the image. To get rid of these use the pencil or paintbrush tool and colour white over those areas. To clear mess out of small nooks and crannies, you might want to try using the Pixel selection tool, then simply fill in the selection you wish to clear with white, or just click Delete, but make sure white is also you secondary colour if you do this (see Fig 5.).
Now you picture should be all cleaned up and looking nice. If you don't want to colour in the line work and wish to now save your image, so you can put it up on the web, adjust image size: -Image -Image size. You'll possibly want no more than a pixel width of 500 pixels, but it depends if your image has load of detail or not. I suppose you'll have to be judge of what image size looks best for your particular picture, but have a look of other's artwork site and see what sort of sizes they use for their pictures. You can do this by right clicking the full sized image and selecting properties. Joining up two separate images: adjust the canvas size (-Image -Canvas size) of scan #1 to little over double and make sure to have white selected as your secondary colour Now go back to scan #2, select the layer 'Background' in the layers tab. and drag this lager on top of scan #1. Use the drag tool to move scan #2 so it fits in perfectly (or nearly) next to scan#1. A good tip when adjusting scan #2 position is to zoom in at 100% and get the lines flush with scan #1. If the lines simply refuse to join up properly, you might need to rotate Scan #2: -Edit -Transform -Rotate. Use trial and error to very lightly rotate the layer and see if it joins up better after the rotation. After you've got it lined up nicely flatten the image and go though the previous preparation process. Summary:
|
||
|
|
||||
|
|
||||
|
All material used on this site is © of their respective owners and may not be used without the owner's consent. Organic Metal is copyright © 2000 - Present Ben Krefta. |