Enjoy
your stay...
|
Enjoy
your stay...
|
|
|
|
|
|
|||
|
|
|
It's important to be able to transfer your pictures into a digital format on the computer without losing any of the original quality. Or even better, making the scan look better than the original! It's good to know how to enhance your images to make them look cleaner and sharper than your original artwork especially if you intend to CG (colour digitally) your work. For the examples below I'll be using a HP 5400c Scanjet with PhotoShop 6 on PC as my graphics software. Go to: -File -Import -HP Precision Pro 3.1…
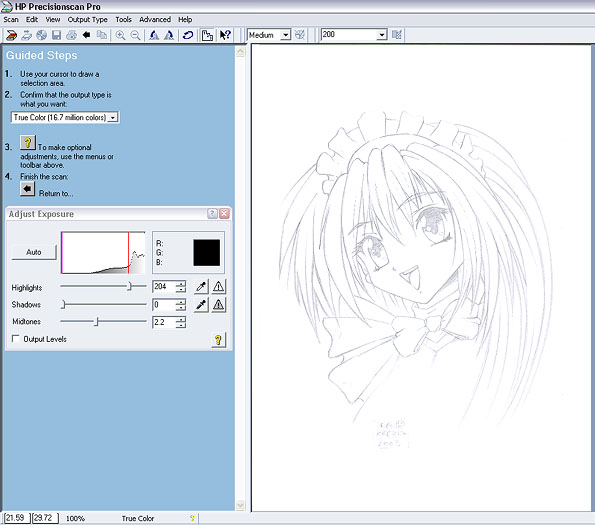
A scanning menu or window appears (See Fig 1.) after the scanner performs a quick Prescan of the image. The Prescan alone could take anywhere up to a minute depending on your scanner. After the Prescan is complete, you'll see the image you placed into the scanner on the right and it shows what the image will look like when scanned in properly. There's a few things you can do at this stage to get better scan results: Set
the scan resolution option to 300dpi (dots per inch). This will produce
a high resolution scan which will be easier to CG and work on later
plus high dpi scans equal better print results. 300dpi should always
be your minimum when scanning artwork, but if you just want to quickly
scan in a rough sketch, then 72dpi would be fine. Also the more dpi,
the longer it takes to scan and the larger the image size will be after
it's scanned. You can always downsize your image later if you intend
to publish it on the web or e-mail it to friends etc. After setting the resolution, Follow the guided steps:
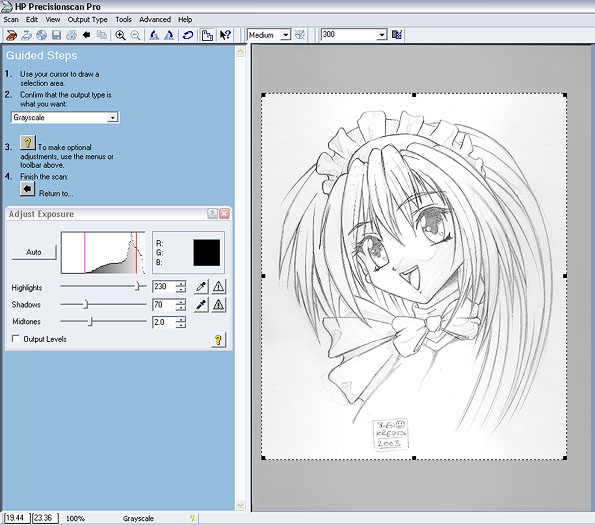
If scanning Pencil or Ink, make sure the scanner is scanning in GRAYSCALE and not B/W (black and white), TRUE COLOR or RGB /CYMK (colour). The bad thing about B/W is that the scanned lines are black and white pixels only, and the lines are not anti-aliased (which means the lines come out jagged and pixely). The Bad thing about RGB is that the scanner will pick up unnecessary colours, when all you want is the gray/ black and while line art. Note for scanning from a sketch book: Make sure when scanning, the scanner lid is firmly down. You could always leave a heavy weight on it while it scans, so there's always an even pressure being applied to the scanned piece of work. If you were to hold the lid down manually and you were shaking, the scanned lines might come out looking crooked. The closer the image is the scanner's glass, the more detail the scanner will be able to pick up. Sometimes if the scanner lid isn't shut, outside light can get in and reflect on the to image, which furthermore reduces scan quality. If your picture takes up more than the scanner's surface area, you will need to scan it in two halves and join it up later. Once again, while scanning, make sure the lid is pressed down where the second half overlaps or you'll end up with a big, faded gray area near the edge of the scan. Though this is important, don't press down REALLY hard so it leaves a great big crease in the middle of the work. After scanning the first piece, scan the next with exactly the same settings as the first (300dpi, gray scale etc.) Summary: ·
|
||
|
|
|
|||
|
|
||||
|
All material used on this site is © of their respective owners and may not be used without the owner's consent. Organic Metal is copyright © 2000 - Present Ben Krefta. |